Dusted off and updated from an August 2019 post
It starts with a lump of clay…
A lump of clay is centered onto the pottery wheel then shaped into a simple cylinder and shaped some more. After shaping, the mug is ready to be taken off the pottery wheel and set aside to air dry.


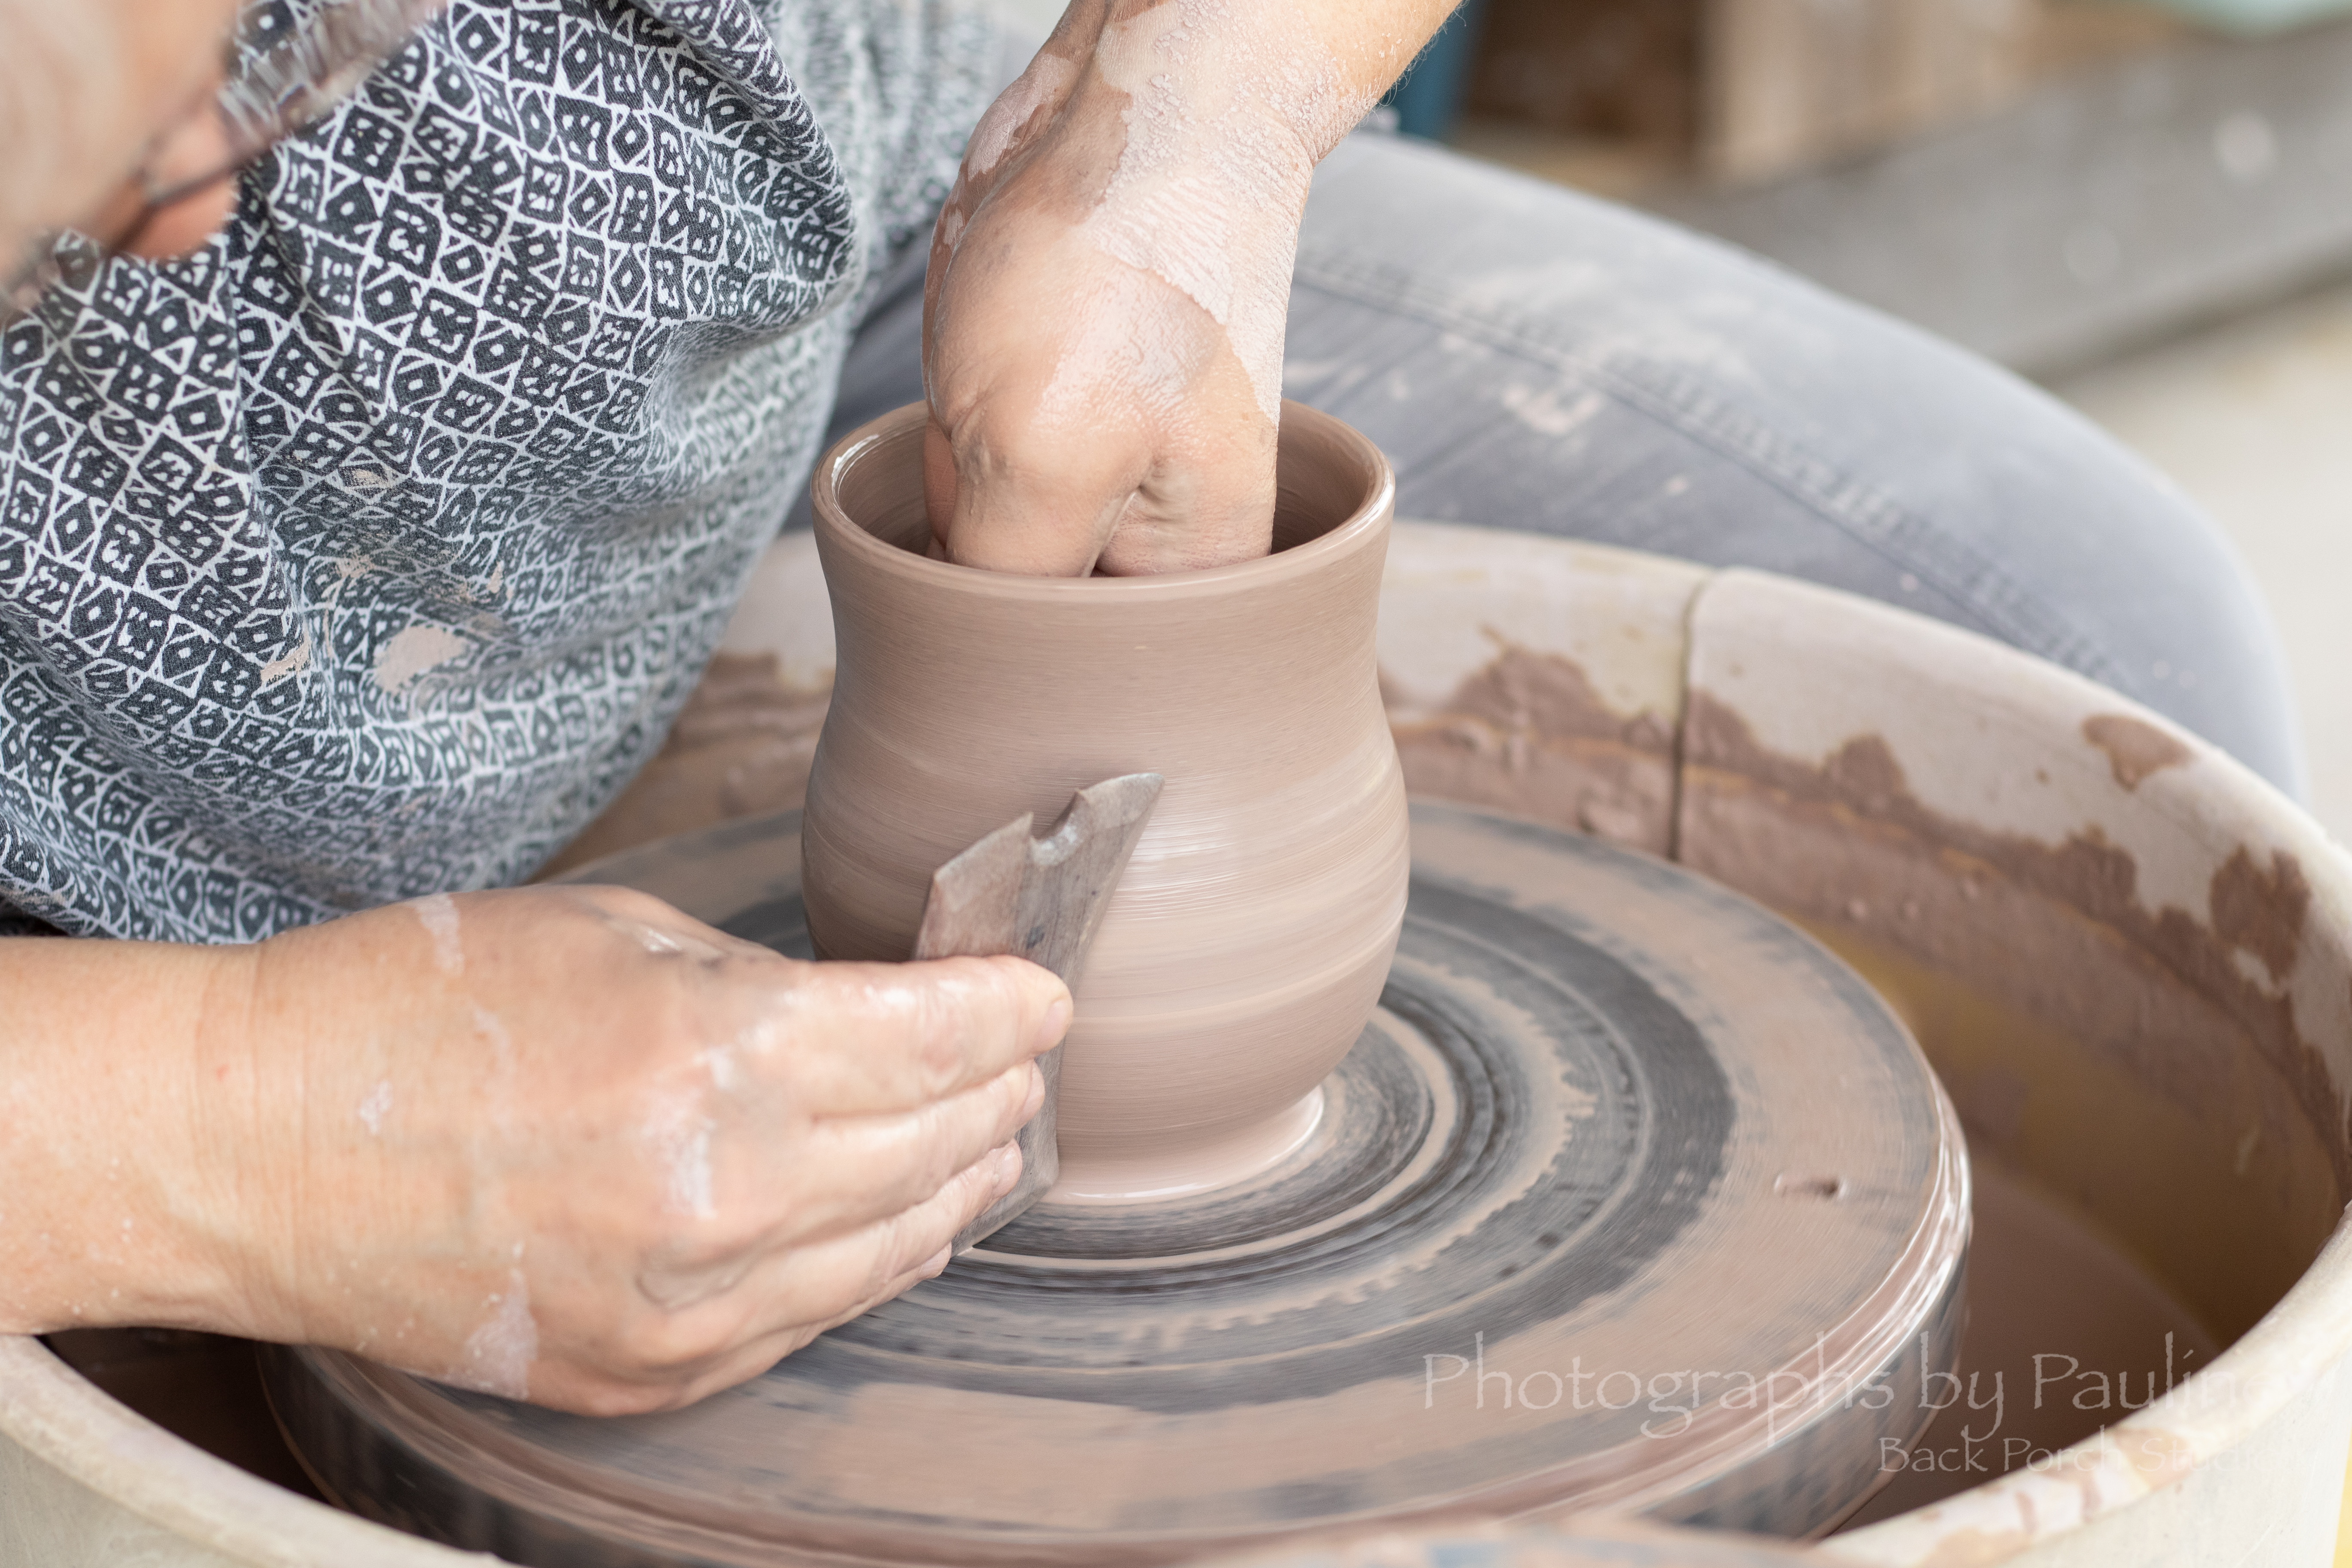


In the mean time, handles are made. I use a handle tool by Tony Ferguson to extract handles from clay. Timing is everything when attaching handles to mugs. Both mug and handle need to be at the right dampness. Not too wet. Not too dry. After the handle is attached to the mug, the mug is set to slowly air dry in a damp box (I use a rubbermaid bin) where humidity can be controlled for 5 to 7 days.
When the mug has been allowed to dry in the damp box but not fully dry that stage of clay is leather hard. The leather hard mug is then air dried more until it becomes bone dry ~ dried as much as possible. Bone dry pottery is called greenware and greenware is very fragile.


The greenware mug now is ready for the first of two firings: bisque firing. After the bisque firing, my brown stoneware clay is now pretty in pink and ready for glaze.
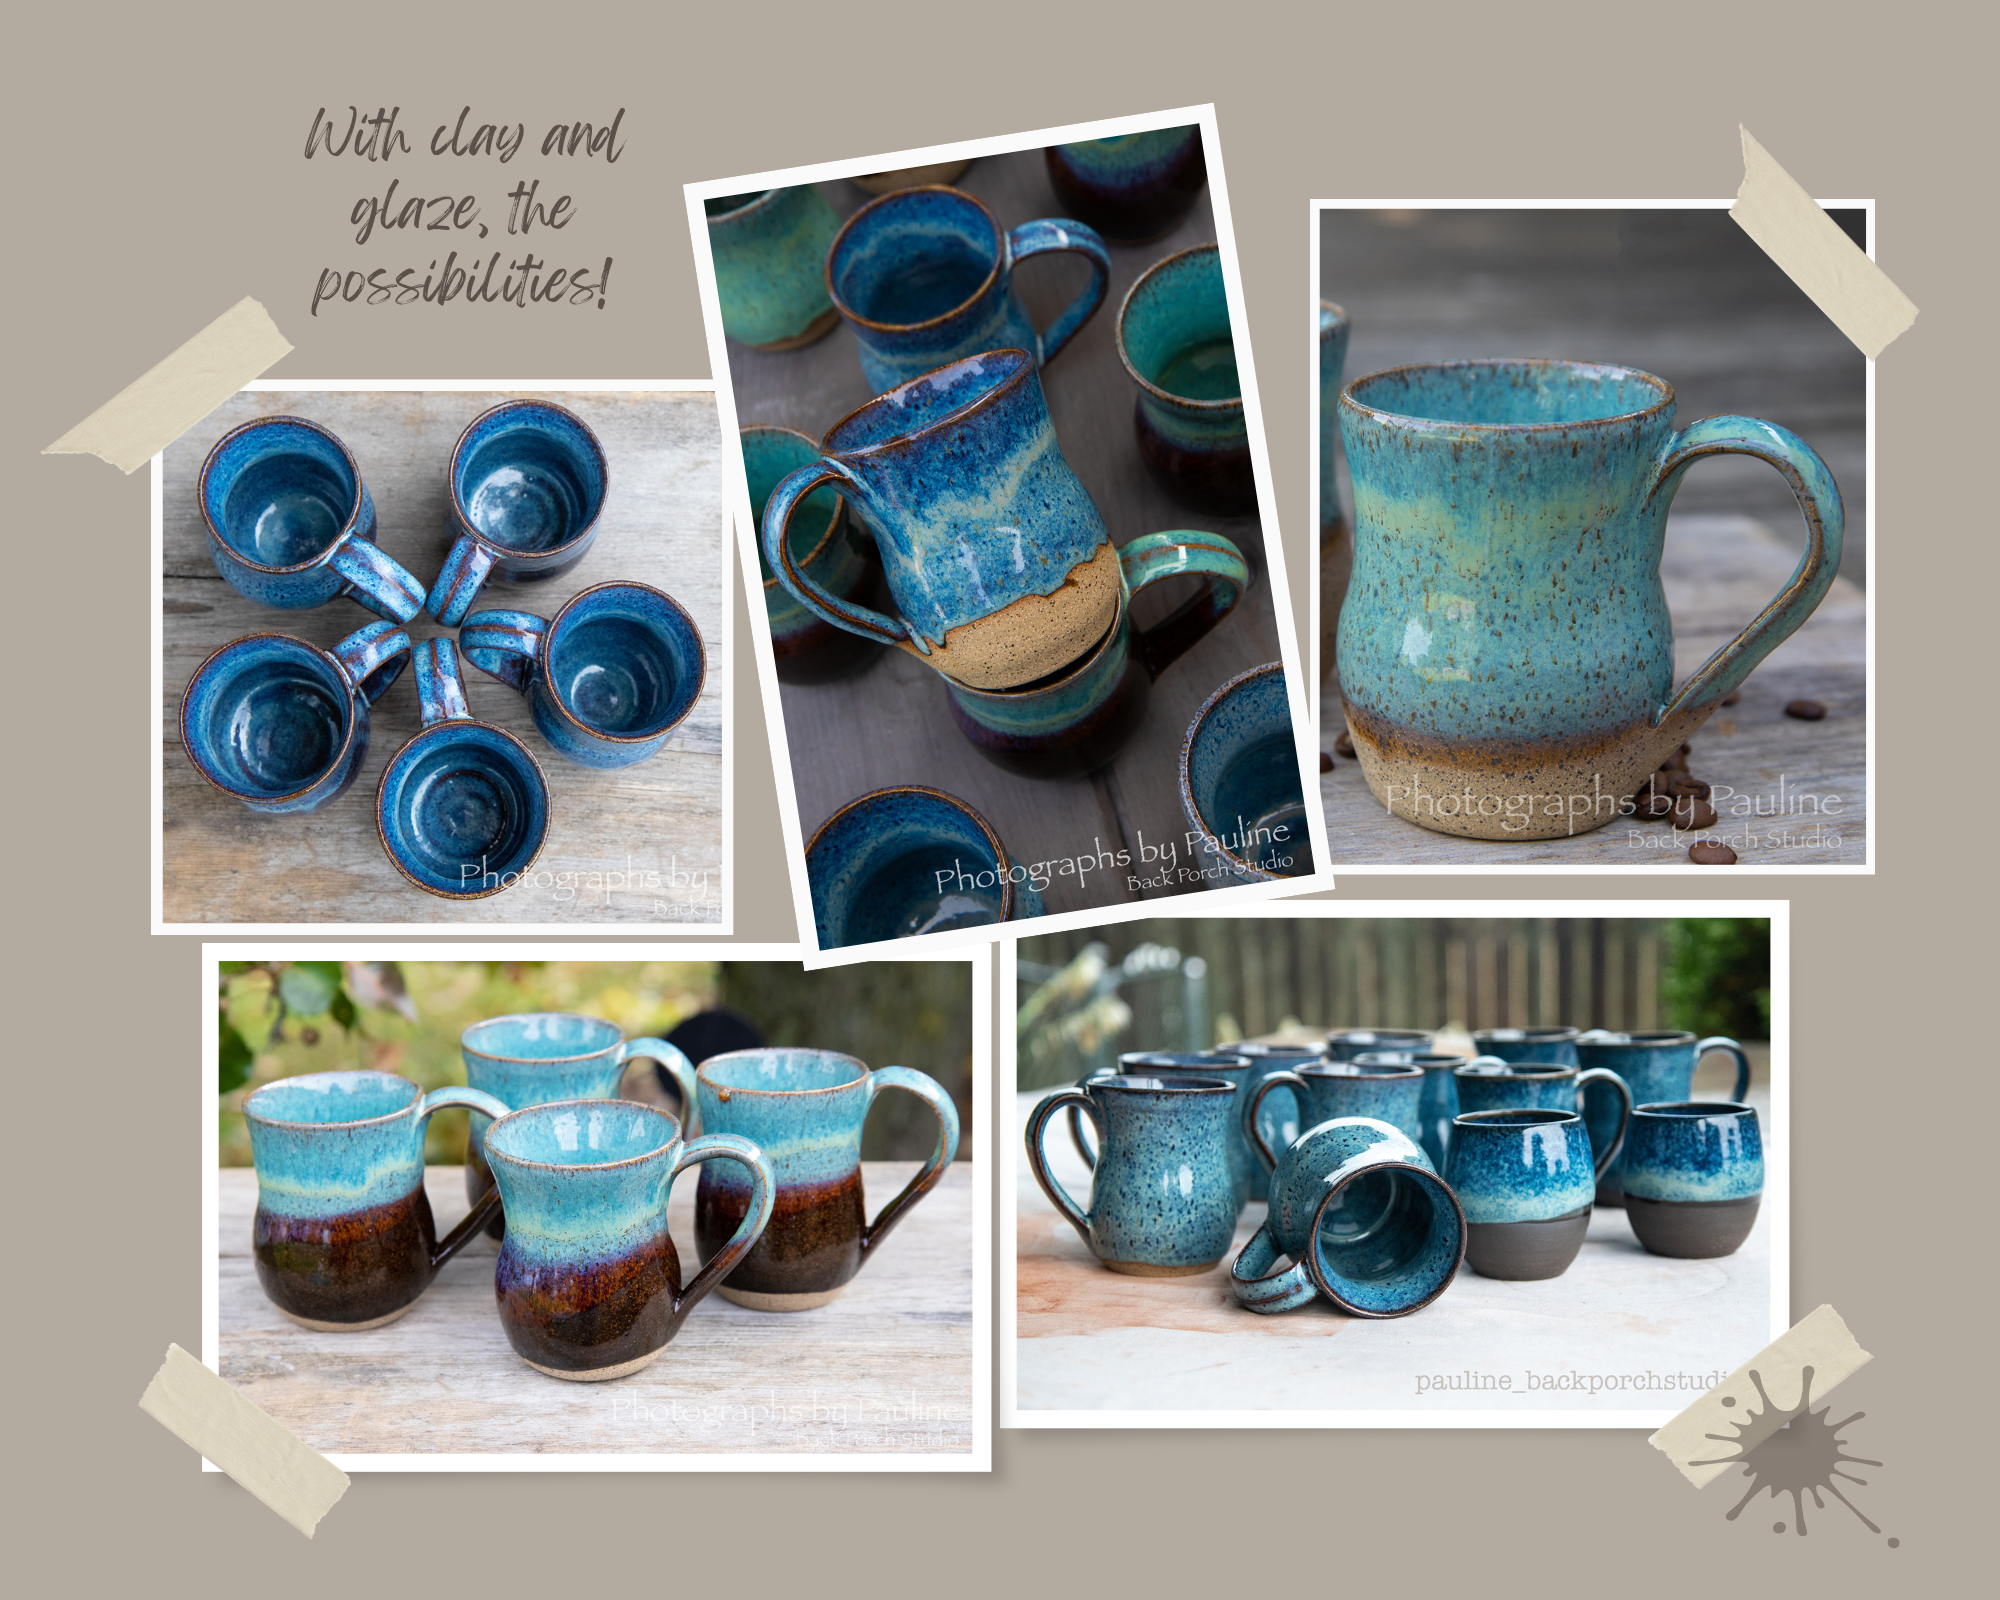
Glaze is applied to the bisque ware mug by dunking and dipping a mug into a bucket of glaze. When the glaze has dried, the mugs goes back into the kiln for a much hotter 12 hour firing which means it will take that long for the kiln to reach temperature at cone 6 (~2200F / 1200C). Once the kiln reaches the cone 6 temperature, it shuts off and that is when magic takes place.
“Anyone who has worked with clay knows there is a lot of process involved. Certain things need to be done at certain times.” ~Meagan Chaney Gumpert

I would love to try this. 🙂
LikeLike
Oh, you should! It all started with one class . . . 😀
LikeLiked by 1 person
Look at how uniformed these are!
How long have you been doing this?
LikeLike
15 years!
LikeLiked by 1 person
Wow.
LikeLike
Your work is a breath of fresh air in a world of mass-production! Beautiful! 🤍
LikeLike
Thank you so much Stacy! 😊
LikeLike